

I recently went on a field trip to the pumpkin patch with my sister, who teaches kindergarten. Early in the morning, when the kids were coming in, she had a coloring sheet left out for each of them on their desks. The next 15 minutes were filled with kids coming to show me their masterpieces. I was taken back to a time when I loved to do the same; elementary school arts and crafts were some of my favorite things to be doing. I’ve always tried to lean into the part of me who wants to be more crafty and resourceful. Over the years, I have tried just about every craft project (at least once) just to see if I would enjoy it! Just last Halloween, I wanted to add to a ren faire costume to make it a pirate costume. Instead of buying something, I found an old, unused bed sheet and cut a headband and waist sash made with just a few safety pins!
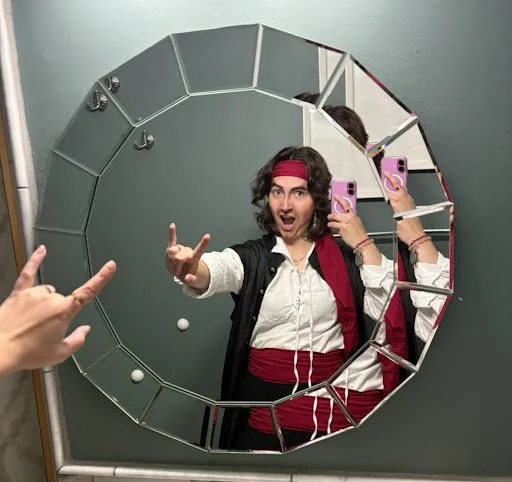
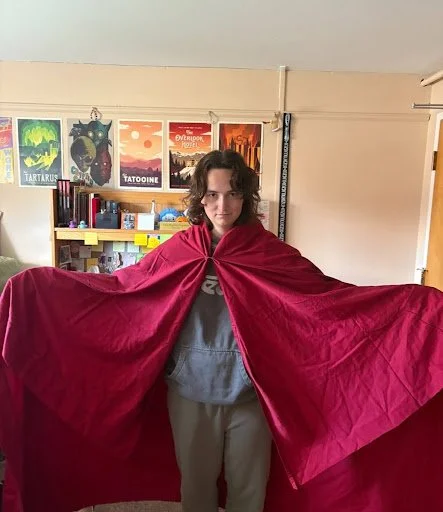
Then I turned the rest of the bed sheet into a surprisingly warm cape (that could be doubled as a Bishop cosplay from Twenty One Pilots lore, iykyk)
Needless to say, I’ve collected a lot of crafty hobbies, and this time of year is my favorite. We are rapidly approaching what I like to call the “craft season,” which is October-February due to the vast number of holidays, time to kill, and cold weather. So for this blog, I’m going to be talking about some of my favorite crafts and dishing out some tips for beginners!
Knitting-
For me, craft season always peaks in December. Almost every December in my household, my mom whipped out the knitting needles to make a stocking for a new family member. “How hard could it be?” I thought to myself; she makes it look so easy. Well, I soon learned that knitting was, in fact, hard.
If you are looking to work with yarn, whether that be crocheting or knitting, I’d recommend learning crocheting first. But if you are determined to be the grandma I know that we all are deep down, here are some tips for learning how to knit.
1. Find the biggest pair of knitting needles you can find.
8.0mm needles are great for beginners. I fell into the trap of trying to go to smaller needles as soon as possible. Heed my warning and don’t do that! In knitting, it's important to see and understand what you are doing; with bigger needles, it makes everything much easier.
2. Focus on one stitch and one color for now.
Like most crafts in this list, the simpler you keep it when learning, the better. You may not know, but knitting has multiple different stitches. The most basic (and therefore important one to learn) is called a Garter stitch. Focus on learning the rhythm of this stitch before you do anything else. In addition, don’t add a new color to your first project. Adding colors can get very complex and overwhelming when you have to start managing 4 different yarns that get tangled very quickly.
My recommendation for a first project would be something like a dish towel or (if you want a bit of a longer project,) a scarf.
Crocheting-
I always wanted to learn crocheting as soon as I learned to knit. I always saw the crochet hooks in the same bag as the knitting needles and figured that once I knew how to knit, it would be easy to learn how to crochet. That turned out to be sort of the truth. Originally I thought knitting and crocheting would be like sisters, but they turned out to be more like cousins. While I thought crocheting was easier to learn than knitting, crocheting has its own challenges that come with it. My advice for beginners is the same as knitting– find the biggest hook you can find. Although my first crocheting project used a smaller hook, I already had the rhythm of knitting down, and it translated very well.
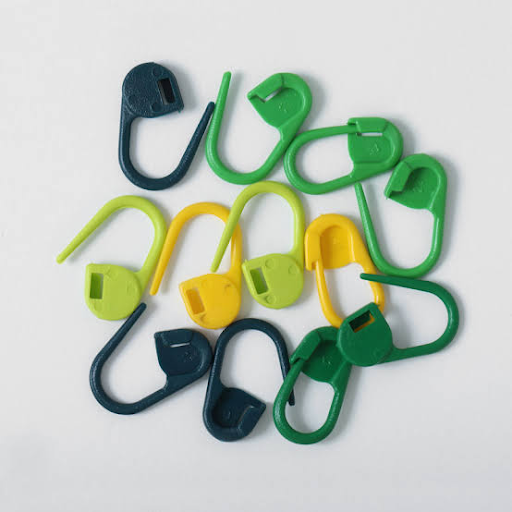
1. Don’t forget your stitch markers.
This is probably my biggest piece of advice for folks new to crocheting. While you can use stitch markers in both knitting and crocheting, I’ve found them much more useful in crocheting, that is, when I remember to use them. A stitch marker is a small little hook used for keeping your place in a pattern. Use them to mark when you just finished or started a new line or stitch on your work. It helps save you a lot of counting and backtracking in the long run.
2. Learn the basic stitches.
While you can get away with only learning one stitch as a beginner, it is much harder in crocheting. I would recommend learning the Chain and Slip stitch, as these are foundational to starting any project. In addition, the single and double crochet are simple to learn and have many uses. If you are looking to create a circle, learn the magic ring stitch, as that is how you will begin your project. All of these stitches can vary on what you are wanting to make but will always be useful to know.
My recommendations for a beginner's project are the iconic granny square (which can be used for a plethora of things) or to look into a Woobles kit. While they can be a bit pricey, they give you everything you need to start crocheting, with YouTube videos as visual aids. The Tanya the Tiger Woobles kit was actually my first crocheting project and where I learned my basics!
Embroidery-
The weird estranged uncle of the family, embroidery is up next! I have loved embroidery ever since I can remember, as there are small embroidery pieces hanging up all around my childhood home. Embroidery was one of the easiest to learn for me, as most embroidery kits have every piece of information you need to know in them. They all come with the floss, hoop, needle, and instructions that you will need. My biggest piece of advice for learning how to embroider is this:
1. Floss management. While you might think you should just do every stitch with the same color floss all at the same time, be careful. Depending on how far away each stitch is from the other, you may be using more floss than is intended. Sometimes it's worth it to end the thread and restart it in a different, closer location. The back of embroidery will always look a bit messy, but keeping it organized and as clean as you can will save you stress later in your project.
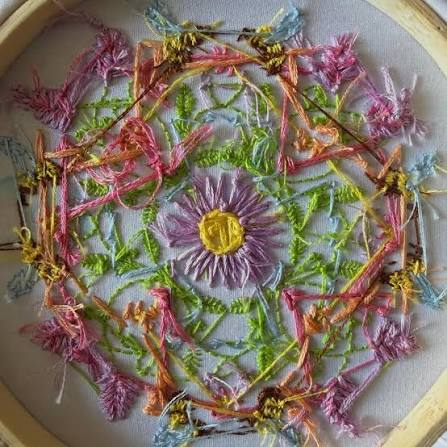
My recommended project for beginners is honestly most kits that you can find in craft stores. Michaels and Hobby Lobby have great selections of embroidery kits that are very beginner-friendly. They may also have some more complex ones, so just remember, if it looks too complicated or there is a lot going on, it might be best to look for a different kit.
Sewing-
In this weird family metaphor, sewing would be the all-powerful Grandmother. Full of endless projects and older than the rest of the crafts on this list, sewing can be intimidating. I learned to sew when I was still in elementary school, as every summer I would go to Peewinkle’s Puppet Studio in downtown Indy and learn to make puppets during their summer program. I remember being terrified of the sewing machine, partially because it was loud but primarily because it was daunting. So many things that spin, and there's a pedal that I had to worry about? But I’m happy to say that my puppet that year turned out wonderful (it was a pig with the most fabulous green eyeshadow you’ve ever seen). So if you are nervous, that is totally normal! If you know absolutely nothing about sewing, I recommend starting with handsewing. My biggest tips for handsewing are:
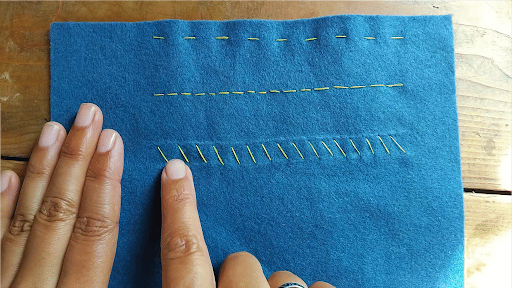
1. Experiment with different stitches.
It can be a worthwhile opportunity to take some common stitches and make yourself a cheat sheet like the image below. I always find it useful to see how the stitch will look once it's done; in addition, this helps me understand why I need to do the steps that I do for a certain stitch.
2. Have fun with it.
While this tip could (and should) apply to any craft, the tasks that seem the most daunting or scary can often benefit from some plain old fun! Once you realize that you can truly try whatever you want, a lot of the stress and pressure that comes with learning falls away. Find a handful of scraps to just stitch together. It doesn’t have to have a purpose other than you experimenting on it!
My recommendation for beginner-friendly hand-sewing projects would be a pillow in the shape of a letter (possibly the one at the beginning of your name) or any small pillow, for that matter!
But let's say that you want to learn how to sew with a machine. Then what? What should you try? My advice for machine sewing is this:
1. Understand how your machine works.
In one of my college art classes, my professor walked us through how to thread a sewing machine, which at first seemed complex. When I learned how to sew with a machine, I always had to have someone else thread it because it was such a mysterious process to me. But as she was teaching us, she explained how and why each step of threading the machine mattered. While I don’t remember each and every step (otherwise I would gladly explain it), it took a large portion of the mystery out of the machine. It helped me understand what exactly it did and how it worked. After that, I understood what I could do with it better.
2. Similar to my other piece of advice for handsewing, have fun with it. Experiment with the machine, find some scraps, and understand what happens when you put the machine on one setting versus another. See how fast the machine can go if you press all the way down on the pedal. See how slow it can go.
My recommended project for beginner machine-sewers is a tote bag. This is what everyone in my college class made to get familiar with the machine, and it only took me a few hours to do. Plus, you get a bag out of it!
If you are someone who needs an in-person visual (much like myself), Stitchworks has many different types of sewing classes available! While November classes are sold out, December classes will be opening soon. Make sure to be on the lookout for classes just in time for the height of craft season!
And, look out for upcoming blogs where I dive into some beginning projects on each of the different ways to craft listed above!
